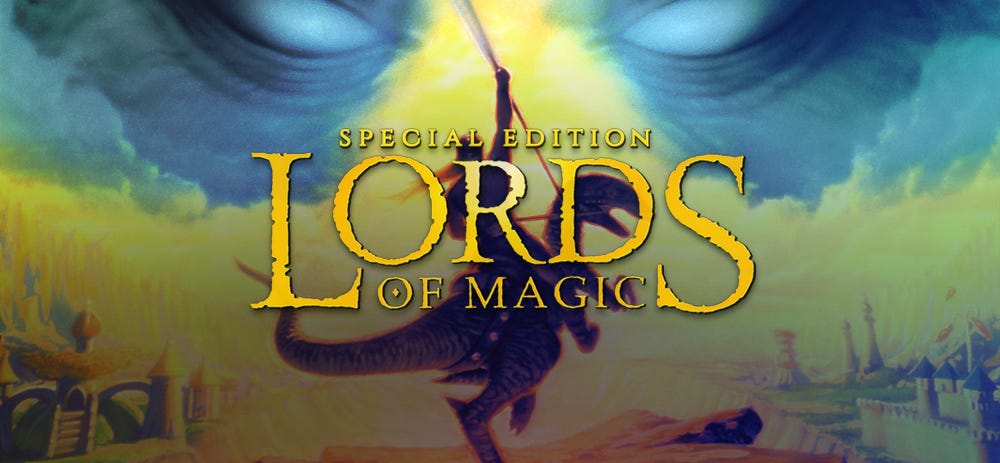
Lords of Magic: The Ultimate Guide
A hardcore fanboy wrote this guide.

A Genius Fanboy
When writing my text “Lords of Magic: The Heroes of Might & Magic KILLER” – I came upon this guide to Lords of Magic.
It was written by a Genius Fanboy called “graym4nendlessincite”. I found it by searching for “lords of magic game mechanics” on Google.
This guide was so well written – that I decided to turn it into its own article. This text. That you are reading right now.
When you have really strong content like this, you only have to add a:
Title
Introduction
Chapters
Pictures
Links
Formatting
Spell checking
–and Voila!
The text ALMOST writes itself.

Blown Away
I played this game back in 1997. This was 27 years ago. I was BLOWN AWAY. I played the first version of the game.
Apparently, the expansion “Legends of Urak” fixed most bugs – and problems, in the original game.
It also added various “Quests”, or playing scenarios, which was dearly needed in the original game.
Since it only had the main campaign. Which was really good, but not enough variation to sustain you for a long time.
The Special Edition of the game is now available on Steam, which includes all the software patches – and the expansion “Legends of Urak”.
This expansion offered almost ENDLESS replayability, according to the reviews on Steam.
Here is the Wikipedia page for Lords of Magic.
Here is my other text about Lords of Magic.

Want More?

Introduction + 14 Parts
This guide consists of an Introduction – and 14 Parts.
They are:
Part 1: Choosing Your Lord
Part 2: Understanding Unit Statistics
Part 3: Lord Options Overview
Part 4: Units besides your Lord
Part 5: Understanding your Faith
Part 6: Difficulty Level
Part 7: Your Starting Goals & Economics
Part 8: Buildings
Part 9: Combat Essentials
Part 10: Fame and Followers
Part 11: Mastering Magic & Learning Spells
Part 12: Diplomacy & Trade
Part 13: Party Composition
Part 14: Maps & Terrain
Let’s go through them in chronological order.

INTRODUCTION: What is Lords of Magic?
LoM = Lords of Magic.
LoM is a strategy game released for PCs in 1997. It combines simplified elements from many gaming genres including:
Real-time strategy (think Warcraft)
Turn-based grand strategy (like Sid Meier's Civilization)
Roleplaying games (Dungeons & Dragons style)
LoM can be considered representative of the 4X subgenre of strategy games:
eXplore
eXploit
eXpand
eXterminate
The player must explore a vast map of the game world, build the military and economic power of his faction by working with or against other factions, and ultimately overcome and destroy the game's villain: the Death Lord, Balkoth.
In 1998 the 'Special Edition' expansion of LoM was released and added:
New buildings
New creatures
-and the more story-based 'Legends of Urak' single-player missions.
PART 1: Choosing Your Lord
In LoM your Lord is your most important unit; the one and only way to lose the game is to have your Lord killed.
While you may think this means you should hide your Lord away from danger you'll be making a big sacrifice in doing so. Your Lord's personal combat powers can exceed any normal unit and are usually essential early in a game.
The first choice you'll make is what type of Lord you'll play: Warrior, Thief, or Mage. This determines your Lord's personal abilities and combat style. Warriors can survive the most hits and do a lot of damage in close combat.
Their unique 'Rally' ability will improve the Attack and Defense of their military units. Warriors can also give experience to your barracks building so that infantry and cavalry produced at it are more powerful.
Thieves are the only Lords with long range projectile attacks. Thieves are also the only Lords capable of entering Stealth mode, making them invisible to enemies until detected.
They also have many unique abilities related to espionage. They can Spy on other Faiths to gain detailed information about them, and they can Steal resources from them. They can Detect other Faiths' thieves.
They can Subdue other Faiths' leader units to take them prisoner. Finally they can Interrogate or Torture prisoners to gain information about the prisoner's Faith. Each Thief is limited to 3 prisoners and they must all be of the same Faith Thieves can give experience to your thieves' guild building so the archers you make at it are more powerful.
Mages can use magic spells by using their unique stat 'Mana Points', which is like ammunition for spells. LoM's many spells have a wide variety of effects: changing the stats of your units or your enemy's, doing unavoidable damage that ignores Defense, changing the map's terrain, and healing damage are just a small sampling of effects.
Mages can give experience to your mage tower building to make the mages created at it more powerful. Mages are the most fragile Lord's and usually have negligible normal combat abilities.
PART 2: Unit Statistics
Before you choose your Lord it is helpful to understand in detail each of your Lord's unit statistics and what they measure.
Hitpoints are crucial to your Lord's survival. Whenever your Lord takes damage the amount of damage will be subtracted from your Lord's current hitpoints. When your Lord's hitpoints are reduced to zero he dies. The hitpoints stat shows your Lord's current hitpoints and maximum possible hitpoints.
Attack shows the base number of damage points your Lord inflicts with each melee (close combat sword/ax/hammer strikes etc) hit he lands. Total damage varies slightly for each hit based on random chance but it will always average around the attacker's Attack stat.
Defense is the amount of damage points subtracted from the attacker's damage when a hit strikes your Lord. If your Lord's Defense is equal to or greater than the damage points and incoming hit inflicts your Lord will not lose any hitpoints. Defense has no impact on magic damage from incoming spell hits.
Range Attack functions the same as Attack be applied to projectiles. If your Lord has no listed Range Attack he cannot launch projectiles. Note that RA projectiles always have infinite ammunition.
Range is the maximum distance away on the combat map in which your Lord can target an enemy with his Range Attack projectile. A higher Range stat represents longer distance targeting
PART 3: Lord Options Overview
To help you pick an appropriate Lord here is a brief summary of each Lord's strengths and weaknesses. I've excluded Death Lords as new players cannot normally choose them.
Warrior Lords
Fire: This Warrior has the highest potential Attack; with the right artifacts a max level Fire Warrior Lord can have higher Attack than any other unit in the game. He also has the second highest hitpoints.
However a fire warrior has the slowest Attack Rate and Hit Recovery of any warrior and this can be overwhelmed and hitstun-locked when facing multiple opponents simultaneously.
Water: this warrior has fast combat speed and the fastest Attack Rat and Hit Recovery. This makes her very hard to surround and hitstun-lock. Her weakness is mediocre Attack and Hitpoints totals
Air: This Warrior has the highest potential Hitpoints and can wield the devastating Thunderblade Greater Artifact. Unfortunately he also requires the most experience points to level up and his Attack Rate and Hit Recovery are just as slow as a Fire warrior's
Earth: This Warrior has the highest potential Defense and is therefore the hardest Lord to kill in most circumstances. His weakness is having the slowest combat speed and least movement points.
Life: this warrior has the fastest combat speed, many movement points, and requires the least experience points to level up. He can also use healing artifacts. He is perhaps the weakest warrior in a melee due to having e lowest Hitpoints and Attack.
Order: this is a well-balanced warrior with above average Defense but is otherwise unexceptional.
Chaos: this Warrior has the second most Attack and a fast Attack Rate, making his damage output the fastest in most fights. However he has the lowest Defense of all warriors and is therefore relatively fragile despite his above average hitpoints.
Thief Lords
Fire: is Thief has the highest potential Attack and maximum Hitpoints along with the second highest Defense (after Death's Thief). This makes the Fire Thief superior in melee combat. However he has the worst Stealth of any thief along with slow Combat Speed and Rate of Fire. These weaknesses limit his effectiveness in the typical Thief roles : espionage and projectile damage.
Water: to is Thief has high Range Attack, fast Attack Rate, and average Range. These stats give her fast Ranged damage output in most fights. The downside is her fragility; she has low hitpoints and Defense.
Air: this thief has the fastest combat speed, above average Range, and can fly. He is also the only Lord with innate Missile Resist (besides Death's Mage Lord). His glaring weakness is having the lowest maximum hitpoints.
Earth: this Thief Lord has the best Stealth Factor and relatively good Defense potential. Additionally he has above average Range. He is slow in Movement, Combat Speed, as well as damage output due to his mediocre Attack and Range Attack.
Life: this Thief Lord has the longest Range along with high Range Attack potential. She is fragile even for a Thief and has pitifully low Attack.
Order: this Thief Lord is relatively tough with above average Hitpoints and Defense potential. He also hits hard with good Attack and Range Attack. However he has slow Rate of Fire and Movement along with a mediocre Stealth Factor.
Chaos: This Thief Lord has shorter Range than most thieves but fast Rate of Fire and good Range Attack potential. She is as fragile as an average thief and her short Range makes dealing damage with her a high-risk, high-reward option in normal combat.
Mage Lords
Fire: Fire Spells are the best at increasing your units Attack and can also deal a lot of direct damage.
This Mage Lord has very high Attack and the second most maximum hitpoints for a Mage (discounting Death's Mage Lord) allowing her to hold her own in dealing melee damage and surviving spell damage.
Her Defense is among the lowest of any unit in the game and she has relatively low maximum mana points.
Water: Water Spells are second best at healing and are versatile except for a relative lack of direct damage spells. Many powerful creatures like Dragons, Demons, the Great Worm and Phoenix take a lot of bonus damage from Water magic. A Water Mage Lord has average stats in every category.
Air: Air Spells are aggressively-oriented with an emphasis on multi-target direct damage attack spells but are still very versatile; Air spells cover most needs besides direct healing. An Air Mage Lord has the highest maximum hitpoints of any Mage (aside from Death's Mage Lord) and the highest maximum Mana points as well.
He has fast Movement and Combat Speed but suffers very slow Attack Rate, despite his relatively high Attack, and even slower Hit Recovery. His other significant disadvantage is requiring more experience points to level up than other Mages.
Earth: Earth Spells specialize in crippling enemies ability to move and act but they have the worst options for dealing direct magic damage.
An Earth Mage Lord has the highest Defense potential (aside from Death's Mage Lord) but relatively low maximum Hitpoints and Mana points. He also has slow combat speed, laughably low Attack, and low Movement points.
Life: Life Spells have, by far, the best options for directly healing your units; they even have a spell for reviving a killed unit during combat! Surprisingly Life Spells also do relatively high direct damage and specialize at damaging Death creatures.
A Life Mage Lord has the highest maximum Mana points but low Attack, Defense, and Hitpoints even for a Mage.
Order: Order spells specialize in increasing the Attack and Defense of your units. An Order Mage Lord has relatively low max Mana points and Attack/Defense along with slow combat Speed and Move points. Remember that he can benefit from his own stat-boosting spells though!
Chaos: Chaos spells have exceptional potency but often have somewhat randomly determined effects including potentially detrimental results such as self-inflicted damage on the casting Mage.
Chaos spells can do almost anything besides direct healing of hitpoints. A Chaos Mage Lord is relatively good in normal combat with her above average Attack, Defense, and Hitpoints and with spells such as Blink and Polymorph Self may be quite hard for enemies to kill.
PART 4: Units Besides Your Lord
Your Lord's personal stats are a small part of your Faith choice. Your Faith selection also determines what other units you can produce at the start of the game. The only ways to gain units of another Faith are trade and conquest.
With this in mind it's also important you have some knowledge about the units each Faith can create if you are to make an educated selection. Each Faith has its own unit for each of the following categories.
Infantry
Infantry: Created at a barracks. Infantry come 3-men per unit (killed men will revive as the infantry unit heals on the world map. All 3 men must be killed to permanently destroy the unit).
In general infantry are your Faith's least expensive melee unit yet have the most maximum hitpoints (when all 3 mens' HP is added together). Usually have slower combat Speed and lower Movement points than cavalry. Infantry also tends to Level up with fewer Experience points than cavalry.
Cavalry
Cavalry: produced at a barracks. Cavalry are also 3-man melee units but usually have better Attack, Combat Speed, and Movement points than infantry. This makes cavalry easier to use than infantry for aggressive damage dealing most of the time.
Missiles/Archers
Missiles/Archers: produced at a thieves guild. Missile units come in a 3-man unit and usually have Speed and Movement similar to infantry but are much more fragile (Fire's solitary Rockhurler is the only exception).
With a couple exceptions most missiles have low Attack. But all of them have Range Attack and for most Faiths are the primary source of projectile damage output.
These 3 categories of military unit have a max Level of 5 and will comprise the bulk of your combat units.
All Faiths also have categories of units that cannot Level up. These units usually are used to supplement and support your main combat units.
They are as follows:
Magic Creatures
Magic Creatures: produced at Mage Tower or Great Temple (for top tier creatures only). These creatures start at their max level and cannot Level up. They do not require the Follower resource to create but also can't be hired as mercenaries.
Basically what you see is what you get for creatures, they'll be fully capable when created and never change. Unlike other unit types magic creatures often (but not always) have innate Resists to different types of damage. The specific Resists vary widely from creature to creature.
Magic creatures vary the most by Faith and can be very dissimilar from another Faith's creature in the same category.
For example the tier 1 creatures from level 1 Mage Towers are Goblins for Chaos, basically an infantry unit, White Stag for Order, which is quick and good at scouting, Dryad for Life, a long range archer type, and Kraken for Water, which can't even move on land and which is mainly used for sinking ships.
Each time you upgrade the level of a Mage Tower you gain the option of producing a new type (or tier as I call it) of magic creature. Higher tier creatures are usually more powerful and max 'tier 3' creatures are often some of the deadliest individual units available to a Faith.
Ships
Ships: Ships can only move on ocean and tend to have formidable combat stats and relatively high cost compared to other barracks units. However the primary purpose of a ship is not to fight but to transport ground units over ocean.
Each ship can carry one leader unit and 3 regular units and up to 3 ships can be in one party. This means a full party of ships can transport a full party of units. Beware should a ship be destroyed any units it's transporting will be destroyed as well.
Scouts
Scouts: scouts are cheap and simple units available from a thieves guild. They tend to have superior Sight and Movement compared to other units of their Faith and they do not require a leader to move efficiently, allowing them to traverse the map solo.
Scouts are always level 1, come a single creature per unit, and have negligible combat abilities. Scouts can scout the map, and not much else.

PART 5: Understanding Your Faith
After you choose your Lord type you'll need to choose what Faith he worships. This choice not only influences your Lord's combat prowess but also influences almost everything about your starting situation.
Each Faith produces military units, leaders, and magical creatures that are unique to it. Each Faith has its own library of spells and arsenal of artifacts that favor its leaders.
Faith even determines what types of map terrain your Lord can fight effectively on. All Faiths' start with differing relationships with each of the other 7 Faiths'. Each Faith has a rival Faith that is hostile from the very start.
This Rival is the Faith opposite to your selection on the Faith selection screen. For example Walter's rival is Fire, Order's is Chaos, and so on. Finally each Faith has its own city which is also your Lord's starting position on the world map.
One Faith, Death, is especially unique. Death is the enemy of all other Faiths' and killing the Death Lord is how every other Faith wins the game.
The Death Lord must kill the other 7 Lord's to win. A new player cannot choose a death Lord for his first game; he must win as another Lord beforehand.
Here is a summary of each Faith's military strengths and weaknesses:
Fire
🔥 Fire: all units have high Attack and most have high HitPoints. Fire has the most powerful magic Creatures but they're also the most expensive and all of them take a lot of extra damage from Water magic. Fire has the worst Stealth and by far the worst ship. Fire also has subpar normal projectile damage, but superior magic damage.
Water
💦 Water: units have balanced stats, except for magic Creatures which are the worst in the game due to being either weak or confined to ocean. Has the second best healing spells and is the only Faith that can create healing potions. Ship has by far the most Movement and so does their Scout.
Air
⛈️ Air: has by far the most flying units and superior Movement points and Combat Speed. Most units suffer from low HitPoints. Magic has above average direct damage options, and is versatile.
Earth
🌿 Earth: units usually have superior Defense while also having high Attack and HitPoints. Units have the slowest Movement and Speed overall. Worst options for long range damage, both from projectiles and spells. Most spell options for impairing opponents movement.
Order
🏛️ Order: units tend to have above average defense and range attack but slow rate of fire and below average Movement points. Has the most spells for increasing your units stats, including several that boost your entire party at once. The most straightforward Faith, imo.
Chaos
🎇 Chaos: units have high Attack and HitPoints but the lowest Defense, by far. Most units also have low Movement points. Shortest Range and overall poor options for ranged damage. Spells are potent but often unpredictable, which you may find amusing or annoying depending on your playstyle and personality.
Life
☀️ Life: units have above average Movement points and Combat Speed but below average HitPoints and Attack. Life has the best projectile and direct damage spell options and overall excels at long Range combat. Life also has the best direct healing spells and above average stealth.
In my opinion Water and Life are the easiest Faiths to play for beginners. They are also the only two Faiths with Spells that directly and immediately restore Hitpoints to your damaged units.
On the other hand Chaos, Fire, and to some extent Earth are a bit more difficult for inexperienced players to succeed with due to their relatively poor Range damage options.

PART 6: Difficulty Level
Once you choose your Lord, the next choice is difficulty level:
Easy
Medium
Hard
Easy will make your Lord and starting party relatively strong at the start of the game, while other Faiths start weaker and fewer Faiths have control of their Great Temple.
On Hard mode it's the opposite: a weaker start for you and a stronger start for more other Faiths.
You may now start the game.
However, before you begin, you also have the option of a 'Custom' start.
Custom will let you modify in minute, exact detail almost anything about your Lord's starting circumstances:
What units he has in his starting party
What level they are
What artifacts he has
What Spells his Faith knows
How many of each resource you start with
–and even if you start with control of your Faith's Great Temple – and a Stronghold with Followers in your Faith's city.
All these benefits are purchased with 'Barter Points'. On Easy you get the most points to spend, on Hard you get the least. The barter point cost of different items may vary depending on your Faith choice.
Units, Spells, and artifacts of the same Faith as your Lord are less expensive. Units, spells, and artifacts of other Faiths, especially of your rival, will be more expensive.
Congratulations if you've found this guide and read this far!
Now you can start the game making a smarter choice then most new players, who just pick whatever Lord looks and sounds coolest!
PART 7: Your Starting Goals & Economics
To understand what you must do at the start of a game it helps to understand the Economics of Lords of Magic.
This may all sound like a lot to take in but LoM's resource system is actually much simpler than in most other strategy games, whether they be real-time like Warcraft or turn-based like Civilization.
Almost all the resources you'll earn you'll receive at the start of each of your turn as an income based on the buildings you control.
Cities produce far more resources than any other buildings and your cities will be your greatest source of resources in a typical game.
However for a city to produce an income it requires two things: a Stronghold and Followers. A city without a Stronghold is listed as Level 0 when you hover over it with your mouse cursor.
Your Faith's city will automatically gain a Stronghold and be upgraded to level 1 when you kill the Faithless Marauder units that start in control of your Faith's Great Temple (Marauders belong to no Lord and are hostile to all Faiths.
Marauders start with control of every dungeon and building besides other Faiths cities and some Great Temples. Marauder parties are identified by Gray colored banners on the World Map).
The second thing your city needs is Followers assigned to the resource-producing buildings within it. Followers are a resource that represents the number of civilians loyal to your Lord's cause.
In addition to producing resource income in a city almost every type of unit besides Creatures and Mercenaries require one Follower to train.
Your Lord starts the game with no Followers, unless you elected to buy a city Stronghold or Great Temple in a Custom start. Like a Stronghold, to gain Followers you must take control of your Faith's Great Temple.
Once you control your Faith's Great Temple you'll receive Followers every seventh turn (turn 7, 14, 21, 28 and so on for the duration of the game) based on the amount of another resource, Fame, you have.
This is the only way to gain Followers, they cannot be traded for or won in battle. The only exceptions are when you first win your Great Temple from Marauders, which will earn you 10 Followers immediately, and when you conquer another Faith's city. Taking another Faith's city will grant you control of its Followers so long as you own it.
Now back to resource production!
There are four buildings in a City where Followers can be allocated to generate resource income at the rate of one resource per Follower assigned per turn.
These resource buildings are the Market, which gives Gold income, the Tavern, which gives Ale, the Temple, which gives Crystal, and the Magistrate, which gives Fame.
Ale is mainly used to create and upkeep barracks units: warriors, infantry, cavalry, ships. Upkeep is the amount of resources you must spend at the start of each of your turns to maintain normal control of the unit.
All units besides ships and some powerful creatures require just 1 resource per turn to maintain. The exception are Mercenaries which are like normal units except they require no follower and much fewer resources to create but an extra four Gold to upkeep.
Ale is also used in lesser amounts to create Mages and Magical Creatures from your Mage Towers or Great Temples.
Gold is mainly used to create and upkeep Thieves Guild units, but is also needed in lesser amounts to create barracks melee units and to create and upkeep ships. As mentioned above gold is also needed in significant quantities to upkeep Mercenaries.
If you do not have the resources to pay for Mercenaries upkeep they will immediately vanish. For normal units failure to pay upkeep will cause 'grumbling' for 3 turns, which will cause you to lose Fame, and then you'll lose control of the units you can't afford to maintain.
Crystal is mainly used to create and upkeep Mages and Magical Creatures. It's also used in lesser amounts to create Thieves Guild units.
You may also spend Crystal at your Mage Towers to receive Healing Potion and Mana Potion artifacts that restore their respective stats when a champion or Lord consumes one.
Within a City you control, Crystal can also be spent at the Temple to restore lost Hitpoints of your units in the city and to Dispel (remove) enemy spells that impair them.
All of these resources (except for Fame) are also needed to increase the level of your City and unit production Buildings.
PART 8: Buildings
The maximum Level for your City and unit production buildings is three. With each level increase your city can have more Followers assigned to each resource building, increasing your income.
For example you can assign a maximum of 8 Followers to the Market for 8 Gold per turn in a level 1 city but in a level 3 city 32 Followers maximum can be assigned to the Market.
With each level increase your City also gains a defensive feature when attacked, first a wall which blocks enemy projectiles then a gate which denies access to all non-flying units until the gate is destroyed in combat or opened by the city-controlling player.
With each level increase your unit creation buildings gain the potential to create more powerful units. BUT, AND THIS IS A VERY IMPORTANT GAME ELEMENT NEW PLAYERS OFTEN MISS, you need your Lord or one of your champions to rest in the appropriate building to bestow a portion of their total experience points to units created at the building.
Higher Level buildings DO NOT mean more powerful units immediately; the level increase only allows the building to gain a higher percentage of the total experience points of a champion resting at it.
EXAMPLE: A Warrior with 1000 experience could impart a total of 40% of his experience , or 400 points, to a level 2 barracks at a rate of 40 points per turn spent resting in the barracks. So after 10 turns in the barracks new units produced at it will start with 400 experience points. A level 3 barracks can take 80% of his experience, or 800 points, at 80 points per turn.
A champion can only give experience points to the same type of building that creates it: Warriors give points to Barracks, Thieves to Thieves' Guilds, and Mages to Mage Towers.
For this purpose your Lord is treated like any other generic champion of the same type and Faith, although he'll typically have more total experience points and thus give more than your generic champions.
To state it simply BOTH a higher Level warrior/thief/Mage and a higher level barracks/Guild/Mage Tower are needed to create new higher Level units.
The building and appropriate champion must be combined for a few turns to get the building to produce upgraded units.
The maximum Level for a generic Champion (warrior, thief, Mage) is 10. For Military Units (infantry, cavalry, missiles/archers) the maximum Level is 5.
Leveling up your units is, especially with the buildings that make them, is ESSENTIAL to developing powerful parties as the game progresses.
You'll likely run out of low difficulty dungeons to use for experience points quite early in the game and high difficulty dungeons often require a prohibitive commitment of resources to win.
Destroying other Faiths units for experience can be unreliable and usually requires you move the units you want to level up right into hostile territory.
Personal Comment
This is a personal comment by the author: When your hero, which might be a warrior, stays in the barracks, it will upgrade all troops made in your barracks.
You venture out into the world with your hero, travel, battle, gain experience. Then, you go back to your city and train the troops.
Every hero can upgrade the troops matching his own profession.
Warrior (trains warriors)
Thief (trains thiefs)
Mage (trains mages)
I found this to be a very cool mechanism.
The longer your hero has been away from the city, the faster your troops will be upgraded. Because the experience gap will now be very large.
You can build up ONE hero, and have extremely strong warriors.
Or you can build up TWO heroes, level them up in a slower fashion, and have moderately strong warriors and moderately strong mages (for example).
Or you can build up THREE heroes separately, which will take even longer. But this allows you to upgrade every single troop type in your town.
Common sense would dictate that the longer the game, the more heroes you should have. For example, in a long game, you should probably have one hero of each type, even if one of them is your primary hero.
Because I remember that the upgraded troops are WAY better than troops without upgrades. When your Mage hero trains your mages, they will actually discover new spells, you can track the progress.
All new mages you build will now know these spells. This mechanism actually mirrors reality, this is one reason I liked it so much!
PART 9: Combat Essentials
Keeping your high-level champions alive is essential so they can keep adding higher experience totals to your unit buildings. So, you'll want to know what you can do to keep them alive during dangerous encounters.
One of the most powerful options for survival is giving the 'Defend' command (Shield icon on unit status bar during combat). Defend adds 50% of the unit's Attack to its Defense, but the unit cannot attack, act, or move while defending.
Since activating and deactivating Defend is instantaneous and can be repeated indefinitely without penalty Defend has no real downside if you have the patience to micromanage the unit.
Most units without a Range Attack can Defend although warriors are certainly best at it due to their high Attack and high base Defense.
Most warriors can become effectively impervious to normal melee and projectile hits when they reach high Level thanks to the Defend command.
Remember Thieves and Mages can't 'Defend', making them even more fragile compared to warriors than they seem at first glance.
To give the Defend command select the unit you wish to give the command to, click the Shield icon in the unit status bar, then click the unit again while your mouse cursor is a Shield. Ordering a Defending unit to take any movement or action automatically negates Defend.
Another simple option for surviving a dangerous combat is to simply have your units run away from combat. On the combat map each of the two parties in the fight has a single banner in it's Faith's color somewhere around the perimeter of the map.
This is called the 'Flee Flag'. If you give the 'Flee' command (click the icon that shows a silhouette of a man running in the bottom right status bar during combat) and one of your units moves to the Flee flag they'll be removed from combat for the remainder of the combat.
The units that successfully Flee will survive combat, even if the enemy wipes out the entire rest of your party. When you click the Flee button all units in your party will try to get to your Flee Flag by the shortest route available but you can cancel some or all of your units fleeing by selecting them and issuing any other command.
Alternatively you may 'Surrender' by clicking the icon which shows the silhouette of a man raising his hands above his head. Surrendering will immediately destroy all the units in your surrendering party except for your champions.
Your champions will become prisoners of the party and Faith you surrendered to. Prisoners may be released by developing good diplomatic relations with the Faith imprisoning them or prisoners may escape and return to your control through lucky random chance.
This gives you some small chance of getting your champion back, one you wouldn't have If you just let him die in combat. Note that your Lord cannot be taken as a prisoner, if your Lord surrenders he instantly dies probably resulting in a Game Over for you.
Also note that surrendering to Marauder parties will always result in all your units, including champions, being immediately destroyed. TBH I've barely ever used the Surrender command and it might not work properly in the base game... this is how I believe surrendering is SUPPOSED to work😪
For the sake of completeness I'll also describe aggressive combat options here; these commands won't directly improve your units survivability but may help them kill enemies faster which, in some cases, may be more important.
Aimed Missile
'Aimed Missile' will make the unit's Rate of Fire slower but increase the unit's Range Attack 50% greater. Due to how Defense works this will usually be a faster way to deal damage to all but the lowest Defense targets.
Only available to units with Range Attack projectile attacks. To use, select a projectile unit, click the Target/Bullseye icon on the unit status bar, then click the target you want to shoot at.
Berzerk
'Berzerk' reduces a close combat unit's Defense to 0 and adds 50% of their Defense to their Attack. Like 'Defend', 'Berzerk' can be micromanaged to avoid its disadvantages.
To use Berzerk select a melee-only unit, click the Flail (ball and chain/stick) icon in the unit status bar then click the target you want the Berserking unit to attack.
Detect Thief
'Detect Thief' is a special ability exclusive to Thieves'. It will render your Thief immobile and unable to act or attack while active, just like Defend.
However instead of increasing your Thief's Defense it increases the chance you'll have of revealing the position of an opponent's Thief while he's using Stealth. Honestly I don't know precisely how Detect Thief works or if it even does anything, but it doesn't seem to hurt you at all and can be activated and deactivated instantly so it can't hurt afaik.
Subdue
'Subdue' is another Thief-exclusive ability. It is a melee point-blank range hit that does 0 damage but, when it strikes an enemy champion, will immediately disable that champion's ability to move and act for the duration of combat.
If you then win the combat you'll get the Subdued enemy champion as a Prisoner of your victorious party. When selecting a prisoner on the world map you get the options to interrogate or torture the prisoner for chance to gain info on his Faith, like his Lord's location, unit locations, map knowledge, resources reserves etc.
You may also execute a prisoner to permanently destroy him or free him to return him to his Faith's control, which may improve diplomatic relations.
Note that a Subdued opponent Lord cannot be taken as a Prisoner, he'll simply be destroyed instead. Each Thief is limited to 3 prisoners and they must all be of the same Faith.
Stealth
'Stealth' in combat can only be used by thieves. When a thief enters Stealth he can move about the combat map invisible to and untargetable by your opponent. Remember that untargetable does not mean invincible or untouchable, if an enemy unit launches a spell or projectile at your thief while he's visible those attacks can still hit and damage him after he activates Stealth.
However they won't be able to target him again until he exits Stealth or gets detected. Attacking or taking any action besides moving or using 'detect Thief' will cause your thief to exit stealth.
There is a brief period wherein your thief cannot reenter stealth after he exits it. Getting detected DOES NOT END STEALTH it simply allows enemy units to see and target your thief while he's still in stealth.
There is a chance that after a brief time a detected thief will go back to being undetected. I honestly do not know the exact gameplay mechanics related to the chances detection, and detection duration, and it seems quite random.
Nonetheless Stealth is a powerful tool for keeping your thieves alive and kicking.
PART 10: Fame and Followers
Now you understand your essential goals upon starting a game: getting experience points for your Lord and leader units, having them improve your unit production buildings, and gaining Followers to produce income in your city and turn into loyal fighting units.
But how do you get enough Followers fast enough to meet your needs for upgrading, expansion, and combat? How do you increase the number of Followers you get every seventh turn?
This is where the final resource, Fame, becomes useful. Fame cannot be traded for from other Faiths: Fame income comes from your city's Magazine strate, your Great Temple, and in small amounts from Statue-type dungeons you control. However Fame is mostly earned by performing well in combat.
Victory in combat will reward you with Fame based on how challenging the battle was and how well you performed. If you beat unfavorable odds and succeed against a superior enemy party while keeping most of your units alive you'll gain relatively high Fame upon victory.
If you suffer a crushing defeat and many of your units are destroyed you'll lose Fame, especially if you were defeated by a weaker enemy party.
However if you deal a disproportionate amount of destruction to a much more powerful enemy party you may actually gain Fame, even in defeat.
Vice versa an overly costly victory in which you squander units against a weaker enemy party may see you lose Fame even if you win the combat. Various tactical blunders may also subtract from your Fame.
Failing to make your unit upkeep payments will subtract from your Fame at the start of each turn you come up short.
Failing thief espionage actions like unsuccessfully torturing prisoners for information or failing attempts at stealing will also reduce your Fame.
Not all Fame points are equal when it comes to getting new Followers. Two types of a Fame factor into the Followers you attract each seventh turn. The first is the most obvious, your Fame reserve.
This is the amount of Fame you have listed next to all your other resources on the world map user interface. A larger Fame reserve means you'll get more Followers, although I'm unsure of the exact programming or math formula behind this. If I had to hazard a guess I'd say you get about one Follower for every 50 Fame in your reserves.
The second type of Fame is recently earned combat Fame. The Fame you gained in the seven turns you wait for the next batch of Followers will gain you even more Followers than your typical Fame reserves.
This is displayed in the Follower pop-up on your seventh turn phrased something like this "word of your recent deeds has also attracted # additional Followers to your cause."
This means recently earned combat Fame can be counted twice for gaining Followers: once as typical reserve Fame and once again as 'recent deeds' Fame. This also means you can do stuff like trade all your Fame for Gold at your city Magistrate and still gain Followers based on your recent combat successes.
This type of Fame is, imo, more important early in a game when there's many dungeons to clear out and your passive Fame income and Fame reserves are lower.
A unique trait of Followers is that, unlike other resources, they are stored in a particular geographic map location, your city. Once you gain control of multiple cities you'll discover the Followers you have at one cannot be used for resource generation or unit creation at the other.

PART 11: Mastering Magic & Learning Spells
Warriors and thieves get better at what they do as they level up but Mages also need something else: you need to learn spells for them to use.
Unless you start as a Mage Lord by default your Faith knows no spells meaning your Mages can't cast anything rendering them practically useless.
The main way of learning spells for your Mages to use is by researching them at your Library. A library is a building associated with and placed right next to a Mage Tower, every Mage Tower has one.
By moving one or more Mages into a library and having them stay there they can research new spells. Note that a Mage can only research at a library at a tower that matches his Faith.
A Fire mage can only research at a Fire Mage Tower library, an Order mage only researches at an Order library and so on.
To begin research double click the library once you've moved an appropriate Mage into it. You will see an illustration of the inside of the library with four books on a shelf in the top right.
Click one of the books to bring up its pages then click 'Begin Research'. The four books each have a different category of spells to research: Attack, Defense, Overland, and General.
Attack focuses on damaging enemies and improving your units' damage potential. Defense focuses on making your units better at surviving and for Life and Water may also include healing spells.
Overland is for spells that are used on the world map instead of during combat and for a few Faiths may even include spells that can damage enemy parties without needing to enter combat.
General Knowledge spells are spells most Faiths get similar or identical versions of which include, but are not limited to: Teleport Artifacts from the caster's inventory to another party, Dispel Magic (canceling another Mage's spell), detecting units of their rival Faith and increasing their party's rate of healing and movement points.
Spells progress in a straight research path within a book, you must learn the spells earliest in a book before you can start research on a spell later in a book. Typically books progress from the least powerful and least Mana costly spells to the most powerful.
The time it takes to research a spell is measured in required man-days of research which are displayed on the spell's page within its spell book. Each mage finishes a number of man-days of research equal to his level each turn.
So a level 1 Mage does 1 man-day a turn while a level 12 Mage Lord would do 12. The man-days of research for each Mage in the library are cumulative so long as the library has enough spots for them to do all research.
The number of spots a library has for researchers is equal to its level: a Level 1 library can have only one Mage researching at a time while a Level 3 library can have 3 researching Mages.
So a level 2 library with a level 3 mage and a level 6 mage researching in it will accumulate 9 man-days of research per turn.
A library will always be the same level as the Mage Tower it's associated with; if a Mage Tower is razed to level 0 its library will also be reduced to level 0.
If you place more Mages in a library than it has research spots for – the highest level Mages will automatically be the ones assigned to research.
Note that if you acquire more than 1 library of the same type, by building a new Mage Tower at a village, research between the libraries WILL NOT be cumulative. In other words you won't learn a spell any faster by having Mages at multiple libraries research it.
However you can make progress on researching multiple spells of the same Faith simultaneously by selecting a different book to research at the other library.
So for example you could progress on research for a Life Attack spell and a Life Defense spell simultaneously by having 2 Life Mage Towers and having one's library research the Attack book, while the other's research the Defense book.
Once your researching Mages have contributed the required man-days of research required to learn a Spell, your Faith will know that Spell for the rest of the game.
There is NO WAY WHATSOEVER to lose knowledge of a spell you've completed research on. If your Mage Towers are all razed, if all your Mages are killed, if all your cities are captured, even if you trade the Spell to another Faith your Faith will still keep the knowledge of it!
However under normal circumstances a Mage can only cast Spells of his own Faith ex. an Earth Mage can only cast those spells in the books of an Earth Mage Tower Library. One exception is by finding a Scroll artifact.
A scroll is an artifact that grants no stat bonuses but allows any mage that equips it to cast the scroll's spell. To the best of my knowledge any spell of any Faith can show up as a scroll.
Like other artifacts scroll's are acquired semi-randomly as rewards for clearing out the Marauders in level 4 or higher dungeons. Note that if you give a Mage a Scroll which contains a spell of the same Faith as the Mage, the scroll will be destroyed, but you'll immediately gain knowledge of the scroll's spell.
Other artifacts may also provide limited uses of another Faith's spell each turn. For example the Ring of Healing allows any Faith's Mage to cast Heal 4 times per turn, even though Heal is the Life Faith's spell.
Artifact spells like this do not require or consume any Mana points when cast. Artifact spells can also allow Warriors and Thieves to cast spells, which they cannot normally do.
The Ring of Healing in this example can also be given to a Warrior or a Thief and allow him to cast Heal 4 times per turn. Unlike scroll's these other artifacts cannot give you knowledge of the artifacts spell.
Give the Ring of Healing to one of your Life Mages before you've finished research on Heal and the Mage will be able to cast Heal but you will not gain knowledge of Heal. Some especially powerful Greater Artifacts also allow the casting of Spells that cannot be researched and are unique to that artifact.
For example the Staff of Incineration allows the wielder to cast the unlearn-able artifact-only combat spell 'Back-draft' which launches multiple Fireballs simultaneously.
The Greater Artifact Ring of Productivity allows its wielder to cast the world map spell Bureaucracy which has the totally unique effect of reducing resource-income produced by another Faith's city and which is unlearn-able and unavailable by any other means.
To cast a spell select a Mage (and only the Mage). In the Mage's status bar at the bottom of the screen up to two spells you know will be listed. Of course you can learn far more than two spells per Faith so how do you access the others?
You can change the spells listed in the status bar by right-clicking one of the spell buttons. The right-click will bring up a new menu listing buttons for other spells of the Mage's Faith you know. Click the spell you want and then select the target you wish to cast it on.
The spells available in a Mage's status bar are also context sensitive to an extent. Overland spells for example have effects on the World map, effects which are irrelevant during Combat, and thus will only be listed when you select the Mage on the World map.
Incidentally, spells may have great offerings when trading with an A.I. Faith, since they have high barter value, you don't lose spell knowledge when you trade it, and the other Faith will not even be able to cast the spell unless they somehow also gain a Mage of the spell's Faith.
It's funny and useful to rip-off the A.I. by trading them your Faith's spells without giving them any of your Faith's Mages to even cast it.This brings me to the final tutorial topic, the Parley inter-Faith trading system.
PART 12: Diplomacy & Trade
Any time one of your parties moves onto the same space on the world map as another Faith's party you'll see a pop-up box giving a brief description of the other party's attitude towards your Faith and the options to Attack, Retreat, or Parley.
Choose Parley and the trading menu will open up. Using the trading menu's interface you can offer to exchange any combination of gold, ale, Crystal, units (except for Lords), artifacts, buildings (except for cities and their buildings), and spells you have for any combination you know the other Faith has.
Note that an A.I. controlled Faith will usually never present units in their Lord's party or their City's guard as trading options. This prevents you from stripping their Lord and City of defenders through parley.
Your trading offer can be characterized in several different ways which alter the chance the AI will accept it and what the diplomatic consequences will be if a trade is made.
These different types of offer are one of either a plea, a request, a gift, a trade, a demand, or a threat. Before you decide what type of context to use for your offer you need to consider your current diplomatic relations with the other Faith.
The trade menu will display the current diplomatic opinion: how that Faith feels about your people. From the most hostile open warfare to the most trusted alliance the possible diplomatic opinions are: Loathing, Hatred, Hostility, Aversion, Distaste, Neutral, Empathy, Trust, Kinship, Pact and Devotion.
The other Faith's opinion of you and the context you present the offer in have almost as much effect on the likelihood your offer will be accepted, and what diplomatic consequences it will have, as the actual value or the items being exchanged.
Plea
Plea: For those cases when you are desperate for something and you do not have any negotiating leverage, you can simply try begging.
This option does not damage their opinion of you too much, but don't expect much generosity from most Faiths. If another Faith comes to you with a Plea for something, and you give it to him, they will be very grateful to you; much more so than if a normal Trade had taken place.
Request
Request: A Request is like politely asking a friend for some help; and they had better be a friend – or you will not receive much.
Once the Request is done, your friend might think less of you. The best thing to do with Requests is to use them sparingly and only on Faiths whom you know you can trust.
Gift
Gift: Most trading partners will accept a Gift (unless they truly hate you). However only a small fraction of the Gift's value will go toward improving the recipient's opinion if they are hostile to you. Don't offer a Gift and ask for resources at the same time, as this can cause a severe loss of face for you.
Trade
Trade: The success of a normal Trade is more greatly based on the actual value of items being traded – but is still influenced by the diplomatic state that exists between the two parties.
If the deal made had unbalanced value for the two Faiths, one side will lose respect for the other, depending on the inequity of the deal and the diplomatic state between the two Faiths to begin with.
Demand
Demand: If you decide that you must have something that another Faith has, you can Demand that they give it to you. If they are not too attached to the goods, they might give you what you've Demanded.
Offering them something in return might help to convince them to give you what you want, but will not decrease the negative feelings that a Demand will generate.
Threat
Threat: When you no longer care about maintaining good relations with a Faith you can try a Threat. Besides attacking their units and buildings there is no quicker way of starting hostilities with another Faith than by threatening them.
Unlike other types of offer the relative military power of the two parties is a factor in the effectiveness of a threat; a Faith which clearly outclasses your own armies is unlikely to be swayed by a Threat.
Remember if an AI Faith approaches one of your parties with a Threat they will likely attack immediately if you decline their offer.
Diplomatic Status
Diplomatic status also influences an AI Faith's military behavior towards you. If you're at Pact with a friendly Faith they'll let your parties pass through their lands unmolested and may even approach them offering Gifts.
At Loathing, on the other hand, your units will be attacked on sight in that Faith's territory and they may even send combat parties to invade and pillage your cities and buildings.
If an AI Faith hasn't yet liberated their own Great Temple from Marauders and you capture it that Faith will swear fealty to your Faith so long as their opinion is Neutral or better.
Fealty will place the Faith swearing it totally under your control: your Faith will gain the other's city, buildings, a portion of their existing units, and even their Lord.
A Lord gained by fealty is like an 'extra life'; if you're starting Lord dies you can carry on the game so long as one other Lord remains under your Faith's control.
Note this also applies to AI Faith's: it's uncommon but occasionally you'll see a pop-up message stating that one AI Faith has sworn fealty to another. If this happens remember you'll need to kill ALL of that Faith's Lords to knock them out of the game.
If you gain control of the Great Temple of a hostile Faith, or one that has already liberated their Temple but subsequently lost it, you may Relinquish control of it and give control to the other Faith to improve diplomatic relations with them.
The AI can even relinquish their control of your Great Temple if they capture it: this will normally only happen if the Faith with your Temple is friendly to you and their opinion of you will somewhat worsen when they give you your Great Temple back.
PART 13: Party Composition
Each party of units you control has a strict unchanging limit on how many units it can contain: a party can have at most 3 Champions and 9 Units. A champion is a Warrior, Mage or Thief, and your Lord counts as a champion.
Units are any other type besides ships and certain Legendary creatures. Each party roster can and will be separated into 3 group segments consisting of up to 1 champion and up to 3 units.
These segments are referred to as 'unit windows' in the game's manual. For practical purposes the unit windows determine how your units will be positioned at the start of a combat, units of the same window will start grouped near each other. A warrior's Rally ability can only boost the Attack and Defense of military units in his unit window.
Champions always occupy the first slot in each Unit Window, and there can only be one Champion per Unit Window. If there is no Champion, this slot will be left empty.
A normal unit can never occupy a champion slot in the unit window even if the slot is empty. Three Units may occupy the remaining slots of the Unit Window.
Up to three Unit Windows will be displayed depending on the size of the party. Adding an additional champion will add another unit window to the party. Exceeding the 3 unit limit per window will also create an additional unit window.
Experience levels are indicated by white line marks beneath each unit icon. Any equipped artifacts appear under the corresponding Champion. The current number of living military unit members (normally three) is indicated underneath that military unit.
If you want more information on a specific party member, double click directly on his or her icon. The resulting popup tells everything you need to know about that unit, including upkeep costs, remaining hit points, movement points, Mana points, accumulated Experience points and the number of additional points needed to increase the unit's Level.
You will also see a Dismiss button here. It is represented by a figure with its back turned and a large X. This allows you to immediately get rid of units you no longer want to reduce your upkeep costs and to prevent other Faiths from killing them and getting experience points.
A Champion cannot wield two magical weapons or two magical protective devices (such as magical suits of armor or shields) at once, as all weapons can be wielded only in the right hand and armor can be wielded only in the left. Champions can wield rings, amulets and potions in either hand.
PART 14: Maps & Terrain
Every Faith has terrain types that impede the speed of its units. Usually adverse terrain includes the home terrain of that Faith's rival, the Lava terrain type, and one other type of terrain.
Units take about twice as long to move and attack on adverse terrain during combat.
Moving over adverse terrain on the world map will use up a unit's movement points more rapidly, so they run out after a shorter distance. Here's a list of all the terrain types and what effects they have.
Mountain: home terrain of Chaos. Slows Order, Death and Water.
Plains: home terrain of Order and Earth. Slows Chaos.
Lava: found in and around Fire's homeland. Slows all Faiths except for Fire and Earth.
Meadow: home terrain of Life and Water. Slows Death, Fire and Chaos.
Desert: home terrain of Fire. Slows Water, Life, and Air.
Ice: home terrain of Air. Slows Earth, Fire and Order.
Swamp: home terrain of Death. Slows Life, Air and Earth.
Road: all Faith's units can move farther per movement point on road.
Ocean: only ships and flying units can move across ocean. Water's ship, the Corsair, travels over ocean farther per movement point compared to other ships.
Impassable: represented on the world map by tall jagged rocks only flying units can even move over impassable terrain.
For the purposes of terrain penalties Marauder-exclusive units seem to be treated the same as Death units.
Note that terrain penalties apply based on the Faith that a unit is native to, not by the Faith that currently controls it.
For example, if Order conquers Water and makes units from Water buildings those units will still be slowed by Desert even though units created at Order buildings are not slowed by Desert.
However the color of the banner that flies above a party on the world map indicates what Faith controls the party regardless of what types of units are in it.
A double banner indicates the party contains that Faith's Lord. The colors of the Faiths' banners are as follows.
Life: yellow
Death: black
Order: off-white beige
Chaos: brown
Fire: red
Water: dark blue
Earth: green
Air: light blue
Marauders: gray

Final Comment
We have reached the end of this MASSIVE GUIDE. The content was not written by me, but by this Genius Fanboy on Reddit.
Here is a link to his guide.
I am impressed with the DETAIL of his instructions, and the LANGUAGE it was written in. This guy could have been a professional writer – no doubt!
I also have to ask myself…
HOW MUCH Lords of Magic did he play – in order to know every single Faith/Hero/Unit combination in the game?
A couple hundred hours?
A couple thousand?
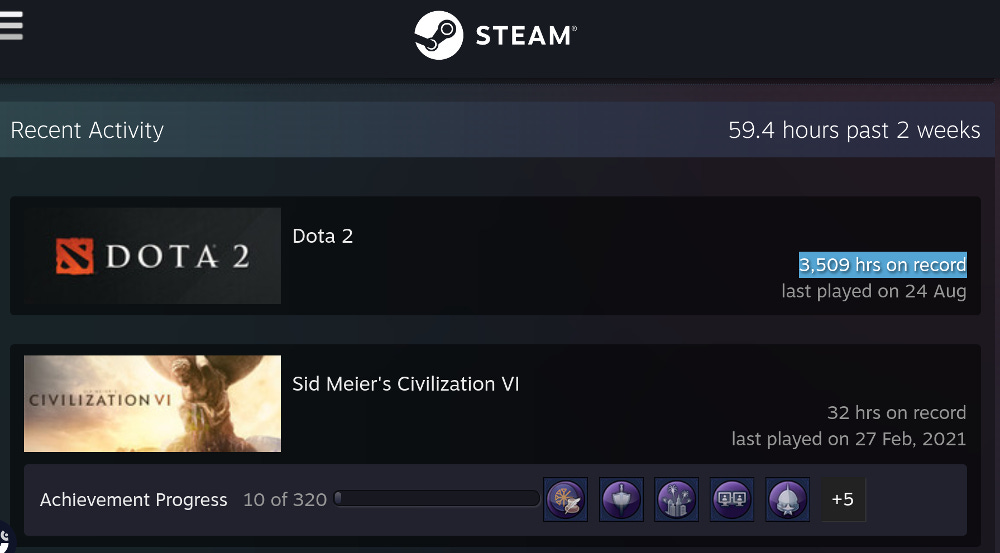
I have played Dota 2 for 3509 HOURS (!), here is my Steam Profile.
Either way, I hope you enjoyed this read!
Want More?
I created a new mobile PVP game called “Chaos Arena”. That text was called: The Ultimate Mobile PVP Game: Chaos Arena
I also created a new hardcore PVP game called “12 Rounds of Chaos”. Here is that text: The Ultimate PVP Game: 12 Rounds of Chaos
I actually wrote a text about Starcraft 2: Billion Dollar Strategy Game: My Starcraft 2 Revamp
I also wrote a text about Dota 2. It is called: Billion Dollar MOBA: My Dota 2 Overhaul
I also wrote a text about the biggest custom game in Dota 2 (that I am addicted to). Here it is: Custom Hero Chaos: The Biggest Game Inside Dota 2
Here is a link to all my published articles on Substack.
Here is a link to all my published articles on Medium.
Here is a link to my Facebook profile.
This text was written by Theo Alexander Gerken.